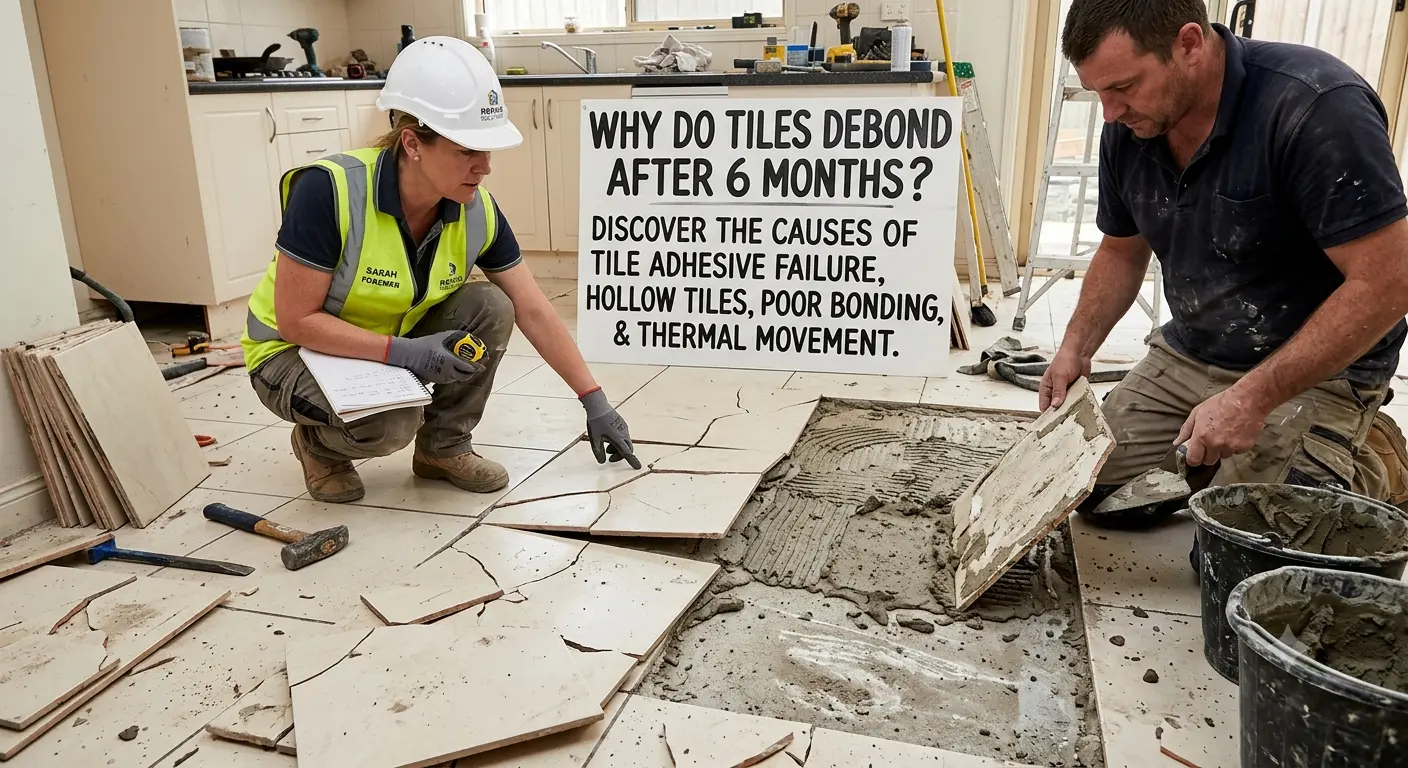
Why Tiles Start Debonding After 6 Months: A Technical Analysis
Have you ever seen a beautifully installed tiled surface start sounding hollow, cracking, or becoming loose just a few months after installation?
This is one of the most common and frustrating problems faced by homeowners, contractors, builders, and tile installers.
What makes the problem even more confusing is that the tiles may look perfectly fine when the project is completed. The actual failure may only become visible after several months.
Tile debonding is rarely caused by a single factor. It is usually the result of a combination of substrate condition, adhesive selection, installation technique, moisture, temperature changes, and movement within the building.
At ETAC Construction Chemicals, we believe that understanding the complete tile installation system is essential for achieving a durable and reliable finish.
What Is Tile Debonding?
Tile debonding occurs when the bond between the tile and adhesive, adhesive and substrate, or another layer of the tiling system becomes insufficient to withstand the stresses acting on the installation.
You may notice one or more of these warning signs:
- Tiles produce a hollow or drum-like sound when tapped.
- Tiles become loose or move under pressure.
- Corners begin to lift.
- Grout joints start cracking.
- Tiles develop cracks or gaps.
- Large sections of tiles suddenly come loose.
- Tiles appear to lift or “pop” from the floor.
The important point is that debonding can be a delayed failure. A tiled surface can look perfect during handover and still contain installation weaknesses that gradually become serious problems.
Why Does Tile Debonding Often Appear After 6 Months?
There is nothing technically special about exactly six months.
The six-month period is often enough for repeated temperature changes, moisture cycles, substrate shrinkage, loading, and building movement to accumulate stress within the tiled system.
A simple way to understand the process is:
Installation → Initial Bond → Environmental Exposure → Repeated Stress → Micro-Damage → Adhesion Loss → Visible Debonding
In other words, the defect may have existed from the day of installation, but the visible symptom may appear months later.
💡 Technical Insight
A tile becoming loose after six months does not automatically mean that the adhesive suddenly “stopped working”. The underlying problem may have started during substrate preparation or installation.
1. Poor Substrate Preparation
One of the most common reasons for tile failure is a weak or improperly prepared substrate. Tile adhesive needs a clean, sound, stable and suitable surface to develop a reliable bond.
Common surface problems include:
- Construction dust
- Cement laitance
- Loose plaster
- Weak screed
- Oil and grease
- Paint or other coatings
- Excessively smooth surfaces
- Cracks or unstable substrate
Imagine applying adhesive over a thin layer of dust. The adhesive may be strong, but it is actually bonded to the dust rather than the structural substrate.
Remember: A strong adhesive cannot compensate for a weak substrate.
2. Incorrect Tile Adhesive Selection
Not every tile adhesive is suitable for every tile and every application. A small ceramic tile installed on an interior wall has very different requirements from a large vitrified tile installed on an exterior wall, balcony, terrace, swimming pool or commercial floor.
Important factors include:
- Tile type
- Tile size
- Tile water absorption
- Substrate type
- Interior or exterior application
- Wet or dry environment
- Expected traffic and loading
- Temperature and moisture exposure
The correct question is not “Which adhesive is strongest?”
The correct question is: “Which adhesive is technically appropriate for this specific application?”
ETAC Tile Adhesive Solutions
| Product | Classification | Typical Application |
|---|---|---|
| ET-111 | C1T / Type 1T | Interior ceramic tile installations on suitable cement-based substrates |
| ET-222 | C2TE / Type 2T | More demanding ceramic, porcelain and vitrified tile applications |
| ET-333 | C2TE / Type 3T | Demanding interior/exterior and moisture-exposed applications involving vitrified, porcelain and selected natural stone applications |
Product selection should always be based on the complete project condition, not simply the name or size of the tile.
3. Insufficient Adhesive Coverage
A tile can look properly installed from the top while large portions of its underside remain unsupported. This happens when adhesive coverage is insufficient. Voids below the tile can become stress concentration points when the surface experiences:
- Foot traffic
- Impact
- Temperature changes
- Moisture movement
- Structural movement
Over time, these stresses may reduce the effective bonded area and contribute to debonding.
Common reasons for poor adhesive coverage
- Incorrect trowel size
- Incorrect trowel angle
- Uneven adhesive application
- Failure to properly bed the tile
- Uneven substrate
- Failure to use appropriate back-buttering where required
- Installing over adhesive that has already skinned
Site Tip: During installation, periodically remove a freshly placed tile and inspect the adhesive transfer on the back of the tile. This is one of the simplest ways to verify actual coverage.
4. Large-Format Tiles Require Greater Attention
Modern tiles are becoming larger, thinner, and increasingly low in water absorption. Large-format porcelain and vitrified tiles have lower tolerance for installation errors because:
- They require better substrate flatness.
- They require more consistent adhesive coverage.
- Voids become more critical.
- Movement can generate greater stress over large surfaces.
For large-format tiles, substrate preparation, adhesive selection, troweling and bedding technique become particularly important.
5. Adhesive Skinning and Open-Time Problems
This is a common site-level mistake. An installer spreads adhesive over a large area and then takes too long to place the tiles. The exposed adhesive surface can begin to skin over. Even though the adhesive underneath may still look usable, the exposed surface may no longer provide proper contact with the tile.
The risk is higher during:
- Hot weather
- Dry conditions
- Strong airflow
- Direct sunlight
Best practice: Spread manageable areas and install tiles within the manufacturer's recommended open time.
6. Incorrect Water-to-Adhesive Ratio
Tile adhesive is an engineered material. It is not simply cement mixed with sand. Its performance depends on a carefully balanced formulation of cementitious binders, aggregates, polymers and performance additives. Adding extra water can change the behavior of the adhesive and may affect:
- Strength
- Shrinkage
- Consistency
- Workability
- Bond performance
Similarly, using too little water can make proper spreading and tile bedding difficult.
⚠️ Never guess the mixing ratio.
Always follow the manufacturer's recommended water quantity and mixing procedure.
7. Thermal Expansion and Contraction
Temperature changes can create significant stress within tiled surfaces. Imagine an exterior wall exposed to strong sunlight.
Daytime → Temperature rises → Tile expands
Night → Temperature falls → Tile contracts
This cycle can repeat hundreds of times. The tile, adhesive and substrate may each respond differently to temperature changes. If the tiled system cannot adequately accommodate this movement, stress can build up and eventually contribute to cracking, lifting or debonding.
This is particularly important for:
- Exterior walls
- Balconies
- Terraces
- Sun-exposed floors
- Large commercial areas
- Heated floor systems
8. Moisture Movement
Water exposure is another major factor in long-term tile performance.
Potential sources include:
- Bathrooms
- Balconies
- Terraces
- Swimming pools
- Water leakage
- Poor waterproofing
- Exterior walls
- Cracked grout and joints
Repeated cycles of wetting and drying can cause dimensional changes within cement-based materials and create stress at interfaces.
This is why some tile installations remain stable initially but begin failing after months of repeated moisture exposure.
9. Missing or Inadequate Movement Joints
A large tiled surface should not always be treated as one completely rigid sheet. Buildings move. Materials expand and contract. Temperature changes. Structural loads change. Movement joints help accommodate these changes and reduce stress being transferred into the tiled system.
They are particularly important in:
- Large floor areas
- Exterior installations
- Terraces
- Balconies
- Heated floors
- Commercial installations
Important: A high-performance tile adhesive cannot eliminate structural or thermal movement.
10. Substrate Shrinkage and Structural Movement
Another common cause of delayed failure is installing tiles before the substrate has sufficiently stabilized. Cement-based substrates may continue to experience:
- Drying shrinkage
- Curing-related dimensional changes
- Structural movement
- Deflection
If tiles are installed too early, movement within the substrate can transfer stress into the adhesive layer. Over time, the progression may look like:
Micro-cracks → Grout cracks → Hollow sound → Partial debonding → Extensive tile failure
11. Poor Curing and Installation Conditions
Adhesive performance depends not only on the product formulation but also on how the product is mixed, applied and allowed to develop its properties.
Factors such as:
- Temperature
- Humidity
- Adhesive thickness
- Substrate condition
- Water quantity
- Open time
- Curing conditions
can influence final performance. Therefore, immediate hardness is not the same thing as long-term durability.
Where Did the Failure Actually Occur?
One of the most important steps in diagnosing a debonded tile is identifying the actual failure interface.
| Failure Location | What It Can Indicate |
|---|---|
| Tile ↔ Adhesive | Poor tile wetting, low coverage, adhesive skinning, contamination or incorrect adhesive selection |
| Adhesive ↔ Substrate | Dust, laitance, weak substrate, contamination or poor surface preparation |
| Within Adhesive | Excessive stress, improper mixing, curing issues or other application conditions |
| Within Substrate | Weak substrate or substrate-related failure |
Therefore, simply saying “the adhesive has failed” is not a complete technical diagnosis.
Why Do Tiles Look Fine Initially?
This is one of the most frequently asked questions. The answer is that many construction defects are progressive. A small installation weakness may not immediately produce a visible symptom.
For example:
- Tile is installed with slightly low adhesive coverage.
- Temperature cycles begin.
- Moisture enters the system.
- Substrate movement continues.
- Repeated loading increases stress.
- Bonded area gradually reduces.
- The tile eventually becomes noticeably hollow or loose.
So, the visible failure may appear six months later even though the underlying weakness was introduced during installation.
How to Investigate Tile Debonding on Site
A professional diagnosis should go beyond looking at the loose tile.
Step 1: Identify the Failure Pattern
Determine whether the problem affects:
- One isolated tile
- A group of adjacent tiles
- An entire room
- Only corners
- Only exterior surfaces
Step 2: Tap-Test the Surrounding Tiles
Compare firmly bonded tiles with tiles that produce a hollow sound.
Step 3: Remove a Representative Tile
Inspect:
- Tile back
- Adhesive transfer
- Adhesive thickness
- Voids
- Substrate condition
Step 4: Identify the Failure Interface
Determine exactly where the separation occurred:
Tile ↔ Adhesive | Adhesive ↔ Substrate | Within Adhesive | Within Substrate
Step 5: Check Environmental Conditions
- Water leakage
- Waterproofing problems
- Direct heat or sunlight
- Structural cracks
- Thermal movement
- Missing movement joints
Step 6: Review Installation Practice
Where records are available, verify:
- Adhesive product used
- Batch details
- Mixing ratio
- Tile type and size
- Trowel size
- Application date
- Substrate condition
- Curing practices
How to Prevent Tile Debonding
Long-lasting tile installation starts with preparation—not after the tile becomes loose.
| Area | Good Practice |
|---|---|
| Substrate | Clean, sound, stable, properly cured and free from dust or loose material |
| Adhesive Selection | Match the adhesive to tile, substrate, environment and service conditions |
| Mixing | Use the specified water quantity and follow the recommended mixing procedure |
| Application | Use the correct trowel and ensure adequate adhesive contact |
| Tile Bedding | Properly bed the tile and use back-buttering where appropriate |
| Open Time | Do not install tiles over adhesive that has skinned |
| Movement | Provide movement provisions appropriate for the project |
| Moisture | Investigate waterproofing and leakage risks before installation |
7 Warning Signs That Your Tile Installation May Be at Risk
Don't wait until tiles start falling off.
- 🔎 Several tiles sound hollow.
- 🔎 Grout joints are cracking repeatedly.
- 🔎 Tile corners are lifting.
- 🔎 Moisture is appearing around the tiled area.
- 🔎 Tiles are moving under foot pressure.
- 🔎 Cracks are appearing across large tiled areas.
- 🔎 Debonding is occurring in similar locations throughout the building.
These symptoms deserve investigation before the problem spreads.
ETAC's Approach to Durable Tile Installation
At ETAC Construction Chemicals, we believe successful tile installation is about more than simply selecting an adhesive. A reliable system requires the correct combination of:
Right Substrate + Right Adhesive + Right Application + Right Environment = Long-Term Performance
ETAC offers tile adhesive solutions for different project requirements, including:
- ET-111 – Type 1T / C1T for suitable interior ceramic tile applications.
- ET-222 – Type 2T / C2TE for more demanding ceramic, porcelain and vitrified tile applications.
- ET-333 – Type 3T / C2TE for demanding interior/exterior and moisture-exposed applications.
Always refer to the relevant product technical documentation and application recommendations before installation.
🏗️ Need Help With Tile Adhesive Selection?
Choosing the correct tile adhesive can significantly influence the durability of your installation.
ETAC Construction Chemicals provides tile adhesive solutions designed for different tile types, substrates and application conditions.
Explore ETAC Tile Adhesives and choose the right solution for your project.
Final Takeaway
Tiles do not usually start debonding after six months without a reason.
The visible problem may be the final result of several factors that have been developing quietly since installation.
- Poor surface preparation can create a weak interface.
- Incorrect adhesive selection can reduce compatibility.
- Insufficient coverage can leave unsupported areas.
- Improper mixing can alter adhesive performance.
- Thermal movement can generate repeated stress.
- Moisture can contribute to dimensional changes and deterioration.
- Substrate shrinkage can transfer movement into the adhesive layer.
- Missing movement provisions can prevent the tiled system from accommodating expected movement.
That is why durable tile installation is a system approach—not simply an adhesive selection exercise.
At ETAC, our objective is simple: help professionals choose the right tile adhesive, understand the installation requirements, and build tile systems that perform reliably for the long term.
Frequently Asked Questions
Why do tiles become loose after 6 months?
Delayed tile debonding can be caused by poor substrate preparation, insufficient adhesive coverage, incorrect adhesive selection, moisture, thermal movement, substrate shrinkage, installation errors or inadequate movement provisions.
Does a hollow-sounding tile always mean the adhesive is defective?
No. A hollow sound can indicate insufficient adhesive contact or voids, but the actual cause should be determined by examining the tile, adhesive and substrate interface.
Can premium tile adhesive completely prevent debonding?
No. A high-quality adhesive cannot compensate for a weak substrate, excessive structural movement, poor installation technique, water leakage or unsuitable application conditions.
Why are exterior tiles more vulnerable to debonding?
Exterior surfaces experience greater temperature variation, sunlight, rain, moisture movement and environmental exposure. These conditions can place greater stress on the tile installation system.
Should large-format tiles receive special installation attention?
Yes. Large-format tiles generally require better substrate flatness, careful adhesive application and high, consistent adhesive coverage.
How can I check whether my tile installation has sufficient adhesive coverage?
During installation, periodically remove a freshly placed tile and inspect the adhesive transfer on the back of the tile. This provides a practical indication of the actual coverage being achieved.
Which ETAC tile adhesive should I choose?
The suitable product depends on tile type, tile size, substrate, interior/exterior exposure and service conditions. ET-111, ET-222 and ET-333 are designed for different levels of application requirements. Consult the relevant ETAC technical information before selecting the product.
Conclusion
Good tile installation is not about sticking tiles to a surface—it is about creating a compatible, durable system.
When the substrate, adhesive, application technique and environmental conditions are correctly considered together, the risk of premature tile debonding can be significantly reduced.
ETAC Construction Chemicals – Building Stronger Bonds. Creating Lasting Structures.